I have already shared with you my love for waffles, my favorite breakfast item. However, my husband prefers pancakes. Pancakes are just okay, I like them enough, but I have never loved them, that is until now. These pancakes are the best I have ever had by far. You have to try these delicious babies!
Oatmeal Pancakes
From: Smitten Kitchen
Yields: About 18 pancakes
Print Recipe
3/4 cup oat flour (you can make this by pulsing oats in a food processor until finely ground; I cup of oats yields 3/4 cup flour)
1 cup flour
2 Tablespoons sugar
2 teaspoons baking powder
3/4 teaspoon kosher salt
3 Tablespoons butter, melted and cooled slightly (plus extra for the pan)
1 1/4 cups whole milk
1 cup cooked oatmeal *
1 Tablespoon honey
2 large eggs
Whisk the dry ingredients together in a large bowl. In a small bowl, whisk the butter, milk, cooked oatmeal, honey and eggs together until throughly combined. Gently fold in the wet ingredients into the dry ingredients. Using a light hand is important for tender pancakes, the batter should be slightly thick with a holey surface.
Heat a 10 inch skillet or griddle over medium heat until water sizzles when splashed onto the pan. Lower to medium-low. Rub the pan generously with butter, this is the key to crisp buttery edges. Pour about a 1/4 cup of batter onto the pan, once bubbles have begun to form on the top side, flip the pancake and cook until the bottom is a golden brown.
Serve the pancakes hot straight from the skillet or keep warm in a low oven. These are great as leftovers too, heat in a low oven or even in the microwave.
*Cook Oatmeal; mix 1 cup water, 1 cup rolled oats, and a pinch of salt in a small microwave safe bowl. Cook in the microwave on high for 1-2 minutes.
Showing posts with label kid-friendly. Show all posts
Tuesday, November 15, 2011
Tuesday, November 1, 2011
Balsamic Glazed Pork Loin (slow cooker)
So I must admit, after posting all the fun Halloween and fall recipes in October, I wasn't very excited about posting anything for November until I had this amazing pork last week. Oh my, it is so good. I couldn't get enough of it. My whole family gobbled it up too.The pork taste delicious on its own, but then you add the sweet tasting glaze and you are in heaven. So. Good.
Even though the pork loin can be a little pricey this is definitely going into the regular rounds at my house. I love it so much! My new favorite meal! To make it even more wonderful, it is so very, very simple to make.
Balsamic Glazed Pork Loin
From: Mel's Kitchen Cafe
Serves: 6-8
Time: 5 minutes prep+ 6-8 hours in slow cooker + 10 minutes to make sauce
Pork:
2-3 pound boneless pork loin roast, trimmed of large fat pockets
2 teaspoons ground sage
1 teaspoon kosher salt
1 teaspoon pepper
2 teaspoons garlic powder
1/2 cup water
Glaze:
1/2 cup brown sugar
1 Tablespoon cornstarch
1/4 cup balsamic vinegar
1/2 cup water
2 Tablespoons soy sauce
In a small bowl, combine the sage, garlic, salt, and pepper. Rub spices all over the roast. Place the roast in a slow cooker and pour in the 1/2 cup water. Cover and cook on low for 6-8 hours. Near the end of the cooking time combine the ingredients for the glaze in a small sauce pan and bring to a boil, then reduce heat and let simmer, stirring occasionally until thickened. Remove the pork from the slow cooker, place on a plate or platter and shred, drizzle the glaze over the pork and serve.
Tuesday, September 13, 2011
Healthy Banana Oat Muffins
These little babies are easy to make, so good for you and taste delicious. I dreamt these up a couple years ago when searching for a healthy snack for my kids, I wanted something I could keep in the freezer to pop out whenever a quick snack was needed or something to go in school lunches. The great thing about these is you take a few out in the morning to put into a lunch and by lunch time they are thawed and ready to eat.
I just made a batch of these and decided to calculate the calories, fat and fiber. When you make them into mini muffins, which I always do, considering four of them is a serving size, I came up with 128 calories, less than 1 gram of fat and 4 grams of fiber, for 4 mini muffins! I figured that a regular size muffin is about two to three of the small ones. So really this is a great little snack that leaves absolutely no guilt. Give them a try! You kids and your waistline will thank you for it!
Healthy Banana Oat Muffins
From: Meg @ Back Pocket Creations
Time: 25 minutes
Servings: About 55 mini muffins or 22 regular muffins
1 1/2 C whole wheat flour
1 C rolled quick oats
1/2 C sugar
1 t cinnamon
2 t baking powder
1 t Baking soda
1/2 t salt
1 egg
3/4 C skim milk
1/3 C apple sauce
1 t vanilla extract
1 c mashed banana (about 3 medium sized)
Pre-heat oven to 375. Coat muffin tin with cooking spray ( recommend the baking kind, but the regular kind will work too) or line with muffin liners
In a large bowl whisk together the flour, oats, sugar, cinnamon, baking powder, baking soda, and salt. Set aside.
In another large bowl, beat the egg slightly, then add the rest of the ingredients and combine throughly. Stir the flour mixture into the banana mixture just until combined, using a cookie scoop for mini muffins or an ice cream scoop for regular muffins, gently scoop the batter out and pour into each individual cup.
Bake for 9-12 minutes for mini muffins and 17-20 for regular muffins or until a toothpick inserted comes out clean. Allow to cool in pan for about 5 minutes and then remove to cool completely. Enjoy now or toss into a freezer bag and freeze for a quick, healthy, delicious snack that your kids are going to love!
Friday, September 2, 2011
Krispie Chicken Skewers
You kids will flip for these. They are so fun and way better than I expected them to be. I thought this was going to be a fun dinner for the kids, but instead turned out to be something my husband and I really enjoyed as well and is now a family favorite. Try these tonight, they will not disappoint!
Krispie Chicken Skewers
Adapted from: Kellogs.com
Time: 55 minutes
Serves: 8
Print Recipe
1 1/2 cups Kellogs Rice Krispies cereal (crushed to 3/4 cup)
2 T flour
1/2 t garlic powder
1/4 t paprika
1/4 t salt
1/4 t pepper
1/2 c grated parmesan
1/4 C vegetable oil
1 pound boneless, skinless, chicken breast tenders
wooden skewers (soaked in water)
In a large re-sealable plastic bag combine cereal, flour, spices and cheese combine well. Pour oil into a shallow dish.
Dip chicken pieces in oil, letting excess drip off. Place 2 -3 chicken tenders at a time into the plastic bag, seal and shake until the chicken is coated. Carefully thread chicken onto skewers. Place on a baking sheet lined with foil and coated with cooking spray.
Bake at 400 for 20-25 minutes or until chicken is no longer pick. Serve with your favorite dipping sauce.
Tuesday, August 30, 2011
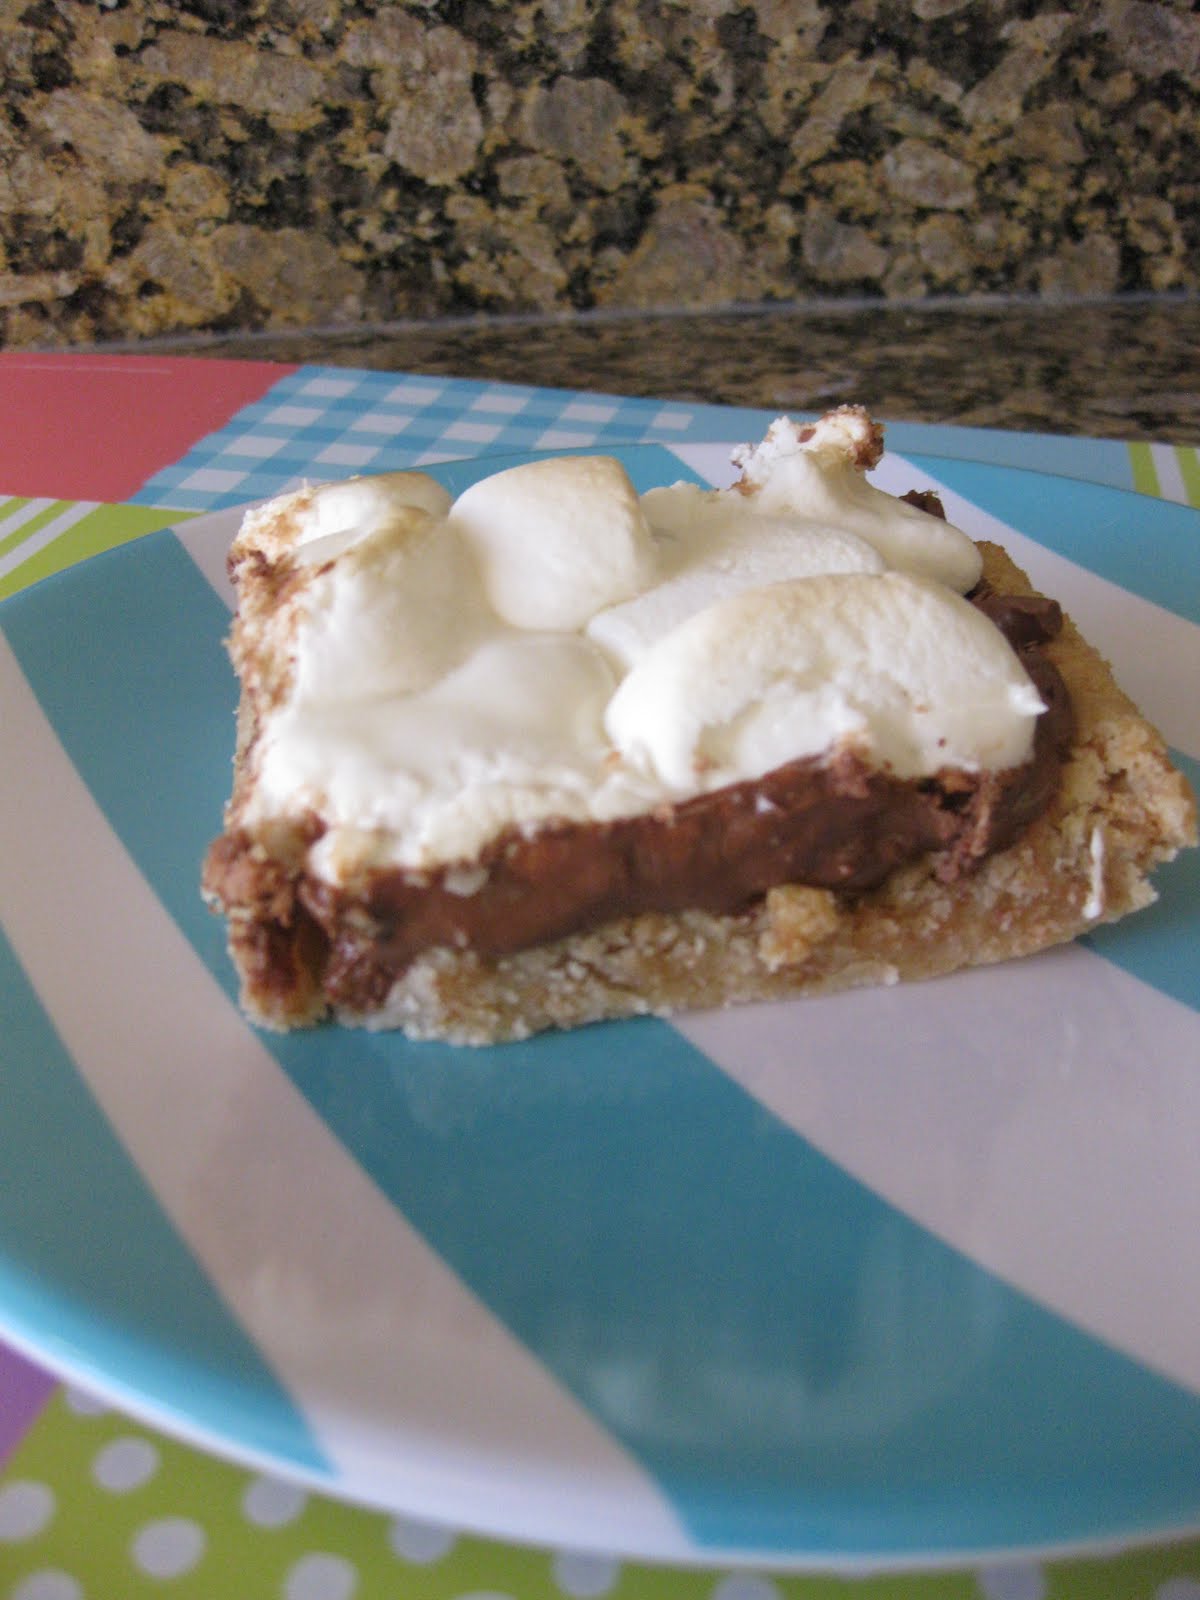
Easy Peasy S'more Bars
You have to make these right now! They are so unbelievably delicious and so easy, start to finish with cleanup and everything takes about 30 minutes. I was so surprised how quick and easy they came together that I was sure they would be lacking in taste. Not true, probably the best s'more dessert around. Now you would think that this dessert would only taste good hot, but you would be wrong, it does taste divine when hot, but even a day or two later this dessert still holds up. I made this Saturday night after a grueling 23 mile run as my reward and my kids polished off the rest as an after-school snack on Monday and it was still so good.
Easy Peasy S'more Bars
Adapted from: Betty Crocker
Time: 30 minutes!
Yields: 9x13 pan
Print Recipe
1 pouch (1lb 1.5 oz) Betty Crocker sugar cookie mix
1 C graham cracker crumbs crushed
1 C melted butter
1 bag (11.5 oz) milk chocolate chips (2 cups)
1 bag (10.5 oz) miniature marshmallows (I used big marshmallows cut in half because it was what I had on hand)
Heat oven to 375 and line a 13x9 pan with foil lightly sprayed with cooking spray
In a large bowl melt butter using the microwave, then add cookie mix and graham crackers, stir until a soft dough forms.
Press the dough evenly into your 9x13 pan
Bake for 18-20 minutes or until set. Immediately sprinkle chocolate chips over the top, let stand for a few minutes until the chocolate begins to melt. Spread the chocolate evenly over the crust.
Sprinkle marshmallows evenly over chocolate and put back in the oven until the marshmallows are puffed and very slightly toasted, about 3-5 minutes. Watch closely because the marshmallows can burn quickly. Cool for 5-7 minutes, remove the bars using the foil and cut in to squares. Be prepared to swoon!
Tuesday, August 23, 2011
Homemade Hot Pocket Sandwich
Okay, so how many of you have tried the hot pockets in your grocers freezer section? I have, and the idea of them is so good, but the taste leaves something to be desired, so I was thrilled when I saw this idea for homemade pocket sandwiches. I quickly gave them a try and I was super impressed, delicious! Plus, my kids love them! The great thing about these is that they freeze really well and can be microwaved for a quick lunch, just like the originals, but much healthier and tastier. Give this a try, you will not be disappointed!
Homemade Hot Pocket Sandwiches
From: Our Best Bites
Time: 1 hour 30 minutes
Yields: 8 Sandwiches
Print Recipe
Dough:
1/2 C warm water
1 T Sugar
1 T dry active yeast
1/2 t salt
3-41/2 C flour
Toppings:
6-8 oz desired deli meat ( I use turkey or ham)
4-6 oz desired shredded cheese ( I use cheddar)
1 egg white beaten
parmesan cheese
In a large bowl (the bowl of your mixer if you have one) combine water sugar and yeast. Let stand for 7-10 minutes until the yeast starts to bubble.
Add salt, then stir. Add 1 1/2 C flour and mix well. Gradually add more flour until the dough starts to pull away from the sides of the bowl.
Spray a glass or metal bowl with cooking spray and place dough in the bowl, cover and let rise about 45 minutes until doubled in bulk.
Turn your dough out on to a surface sprayed with cooking spray and roll into a rectangle about 16 inches long and 8 inches wide.
Using a pizza cutter, cut dough in to 8 equal portions.
Leaving a little bit of a margin on the sides, add meat and then cheese.
Stretch the dough out a little bit to give you more to work with. Fold the top part over the middle
and then the bottom part over the middle,
starting at the bottom tightly roll the filled dough, make sure you get a tight seal.
Place on a sprayed cookie sheet and repeat with remaining dough.
Brush all rolls with egg white and then sprinkle parmesan cheese on top.
When finished cover the pan with a clean cloth and preheat your oven to 425.
When oven has heated, bake pockets for about 15 minutes. Enjoy!
Tuesday, August 9, 2011
Cheesy Potato Rounds
These potatoes are delicious and just about every member of my family claims this as their favorite way to eat potatoes, and we eat a lot of potatoes around here. These are simple to make with simple ingredients, but taste very gourmet. Give these a try today, you will not be disappointed!
Cheesy Potato Rounds
From: Meg @ Back Pocket Creations
Time: 1 hour total time
Yields: 4-6 servings
Print Recipe
8 medium russet potatoes, cleaned, and cut into 1/4 inch slices
1/2 C butter, melted
8 slices of bacon, cooked and crumbled
1 C shredded cheddar cheese
1/2 C green onion, chopped
Pre-heat oven to 400
Pour melted butter onto a large baking sheet, place potatoes on the sheet and the flip over so both sides are coated with butter.
Bake in oven for 20 minutes, remove and flip all the potatoes again and cook for another 20 minutes.
When potatoes are soft and slightly browned remove from oven and top with bacon, green onion, and cheese. None of my kids like the onion and one does not like the bacon ( gasp!) so I purposely leave those toppings off a portion of them. Put back in the oven for about 2-5 minutes until cheese has melted. Serve with sour cream for dipping.
Friday, August 5, 2011
Grilled Pizza Sandwiches
These Sandwiches are great for a fast, quick, kid-friendly meal. I happen to love them and my kids think they are the greatest sandwich on the planet, they ask for them regularly!
Grilled Pizza Sandwiches
From: Meg @ Back Pocket Creations
Yields: 4 Sandwiches
Time: 15 minutes
Print Recipe
1 C Mayonaise
1 1/2 T Italian seasoning
8 Slices of hearty whole wheat bread
40 Slices of pepperoni (I like turkey pepperoni)
1-2 C mozzarella cheese
Mix mayonnaise and seasoning in a small bowl. Spread mixture on one side of all the bread slices. Top half of the slices with about 10 pieces of pepperoni.
Then top the pepperoni with mozzarella
Place the other bread slice, mayo side down on top of the mozzarella then spread the outside with the mayonnaise mixture
Place the sandwich mayo side down on a flat grill or a frying pan sprayed with cooking spray. Quickly spread the mayo mixture on top of the exposed side. Cover the sandwich with a lid, so the cheese will melt, and cook for about 5 minutes or until browned. Then flip and cook the other side until toasted.
Tuesday, August 2, 2011
Egg & Cheese Waffle Sandwich
Here in Herriman, where I live, lots of kids have already started school! Can you believe it? Summer just got started and I feel bad for all the kids who are back in school. Luckily my kids are on a traditional schedule and I still have a few more precious weeks of letting the kids sleep in and stay up late and no homework, but for you moms out there who's kids are already in school or for those of you lucky ones like me here is a great kid-friendly breakfast that you and they will love. It is super easy and tasty and pretty healthy as well. Plus, it feels them up for a day of learning or a day of swimming!
Egg & Cheese Waffle Sandwich
Adapted from: Incredible Egg
Time: 15 minutes
Yields: 4-8 servings
Print Recipe
8 frozen waffles, you can use store bought or I like to use homemade ones that were made previously and frozen for later use
4 eggs, beaten
4 slices of cheese of your choice my kids like american, I like cheddar
Pre-heat oven to 400. Spray a baking sheet with cooking spray, place waffles on baking sheet.
Spoon egg over waffles, spreading to fill the cavities.
Bake until egg is set and waffles are crisp. 10-12 minutes.
Top four waffles with cheese and cover with the remaining waffles and press together. Let stand for 1 minutes to allow the cheese to melt. Cut in half and serve to those hungry kiddos. For younger kids with smaller appetites a half of one of these should be plenty for them.
| Briggs |
| Aiden |
| Gavin |
| And Annabelle, all enjoyed these! |
Tuesday, July 26, 2011
Lemon Salmon with Dill Sauce
My husband and I both love salmon. However, we disagree on how we like it prepared, his favorite is Honey Mustard Salmon which I will get around to posting someday. Mine is Brown Sugar Salmon. The kids like both, but have yet to be enthusiastic about either. Well folks, today this all changes, everyone in the family now claims this as their favorite salmon recipe. My kids could not stop talking about it! Hours after dinner my eight year-old told me, " Mom, that fish was so good, I love it." Everyone gobbled it up and we were sad that there wasn't more. Trust me on this one, this fish will be a hit at your house too!
Lemon Salmon with Dill Sauce
Adapted from: Taste of Home
Yields: 4-6 servings
Time: About 45 minutes
Print Recipe
Fish
1 salmon fillet (about 2 pounds)
1 1/2 t Lemon-pepper seasoning
1 t onion salt
1 small onion, sliced and separated into rings
1 lemon cut into slices
1/4 C butter cut into small chunks
Sauce
1/3 C sour cream
1/3 C mayo
1 T finely chopped green onion
1 t lemon juice
1 t dill weed
1/4 t garlic salt
pepper to taste
Combine the sauce ingredients until smooth. Chill for up to two days in advance or at least two hours.
Preheat oven to 350 degrees
Line a 15x10 inch baking sheet with heavy duty foil, make sure you leave extra on the edges, as you will be wrapping the salmon, grease foil lightly. Place salmon skin side down on foil. Sprinkle with lemon-pepper and onion salt. Top with onion and lemon. Dot with butter. Fold foil around salmon and seal tightly.
Bake for 20 minutes.
Open foil and push the onions and lemon off to the side, so the salmon can get nice and brown, put back in the oven and broil 6-8 inches away from the heat for about 15 minutes or until the fish has browned slightly and flakes easily with a fork.
Serve with dill sauce.
Lemon Salmon with Dill Sauce
Adapted from: Taste of Home
Yields: 4-6 servings
Time: About 45 minutes
Print Recipe
Fish
1 salmon fillet (about 2 pounds)
1 1/2 t Lemon-pepper seasoning
1 t onion salt
1 small onion, sliced and separated into rings
1 lemon cut into slices
1/4 C butter cut into small chunks
Sauce
1/3 C sour cream
1/3 C mayo
1 T finely chopped green onion
1 t lemon juice
1 t dill weed
1/4 t garlic salt
pepper to taste
Combine the sauce ingredients until smooth. Chill for up to two days in advance or at least two hours.
Preheat oven to 350 degrees
Line a 15x10 inch baking sheet with heavy duty foil, make sure you leave extra on the edges, as you will be wrapping the salmon, grease foil lightly. Place salmon skin side down on foil. Sprinkle with lemon-pepper and onion salt. Top with onion and lemon. Dot with butter. Fold foil around salmon and seal tightly.
Bake for 20 minutes.
| After 20 minutes, before broiling |
Open foil and push the onions and lemon off to the side, so the salmon can get nice and brown, put back in the oven and broil 6-8 inches away from the heat for about 15 minutes or until the fish has browned slightly and flakes easily with a fork.
Serve with dill sauce.
Friday, July 22, 2011
Smoked Paprika BBQ Potatoes
These potatoes are quick, easy, kid-friendly, and very good! Plus, you don't have to heat up the oven to eat them. A perfect summer dish!
Smoked Paprika BBQ Potatoes
From: Jamie Cooks it Up
Yields: 5-7 servings
Time: 20 minutes
Print Recipe
8 small-medium russet potatoes
1/3 olive oil
1 T smoked paprika, must be "smoked" (I found this cheapest at Wal-mart)
Salt and Pepper to taste
Dipping Sauce
1/2 C mayonnaise
1/2 C favorite barbecue sauce
Combine the dipping sauce ingredients and mix well. Refrigerate until ready to serve.
In a large bowl pour in the olive oil add the smoked paprika and salt and pepper, stir.
Wash your potatoes, cut them into 1/4 inch slices. Put them into the bowl with the oil and seasonings and toss to coat.
Pre-heat your grill to medium heat. Place potatoes on grill, I did some on the 2nd rack and some on the direct rack, they both cooked at about the same pace?? Who knows why, but it took about 7 minutes per side. Remove from grill and serve with the dipping sauce.
Tuesday, July 19, 2011
S'more Cookies
I can hardly contain my excitement about this recipe! I totally made these up and I was so nervous that they would not turn out, but the did and they are my new favorite cookie. They are sooo good. You need to give these a try. While they may be a bit more work than regular s'mores they are much simpler and cleaner to eat. Especially for kids. Yummy, I love these, I will be making these all summer long! I apologize for not getting very good pictures of these, I was too busy eating them to take too much time on a picture, but you get the idea.
S'more Cookies
From: Meg @ Back Pocket Creations
Yields: 28 cookies
Time: About 1 hour 15 minutes-but worth every second!
Print Recipe
3 C flour
1 t salt
1 t baking soda
1/2 C butter
1/2 C butter flavored shortening
3/4 C brown sugar
1 C sugar
2 eggs
1 T vanilla
1 package graham crackers, crushed (about 1 1/2 cups)
5 regular size Hershey bars
14 large marshmallows
Pre-heat oven to 350
In a large bowl, mix together the flour, salt and baking soda, set aside. In another large bowl, cream together the butter, shortening and sugars with an electric mixer for about 2-4 minutes. Add the eggs and vanilla and beat for another minute. Slowly add the flour mixture and then the graham crackers.
Now time to create the masterpiece! Separate your Hershey bars in to two squares each, they don't need to be hooked together. Cut each marshmallow in half, this works best if the marshmallows are slightly frozen and using kitchen scissors.
Now scoop out a rounded tablespoon of dough and flatten it on your counter top. Place your chocolate on top and then top that with a marshmallow
Scoop out another rounded tablespoon of dough flatten it out and place on top of the marshmallow
Now, scoop the entire structure into your hands and form a nice round ball, place on a parchment lined cookies sheet.
Bake for 10-13 minutes. Remove from oven and let sit for 3 minutes before transferring to a cool flat surface.
Subscribe to:
Posts (Atom)